This document provides a comprehensive overview of using Yarnit's campaign builder feature. It will guide you step-by-step through the process of creating and managing campaigns effectively, allowing you to efficiently plan and generate content with ease.
Step 1
Welcome to Yarnit! To get started with building campaigns, navigate to the left sidebar where you will find the campaign icon. Click on it to access your campaign dashboard.
Step 2
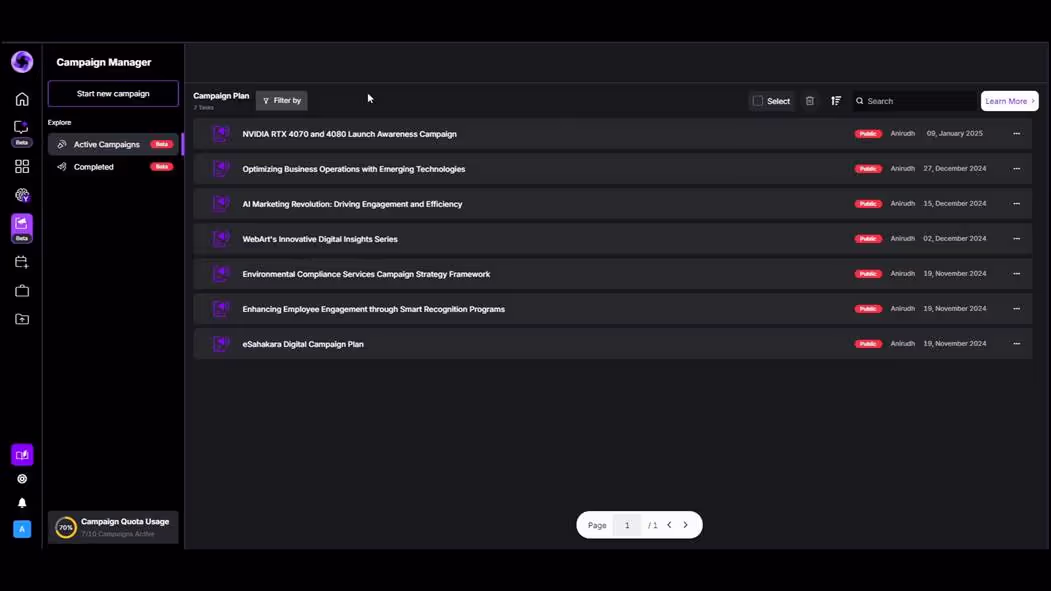
Within the campaign dashboard, you'll be able to view all your previously launched campaigns. To initiate a new campaign, click the "Start Campaign" button and provide some initial ideas about the campaign you want to create. For this example, we'll select a rebranding campaign.
Step 3
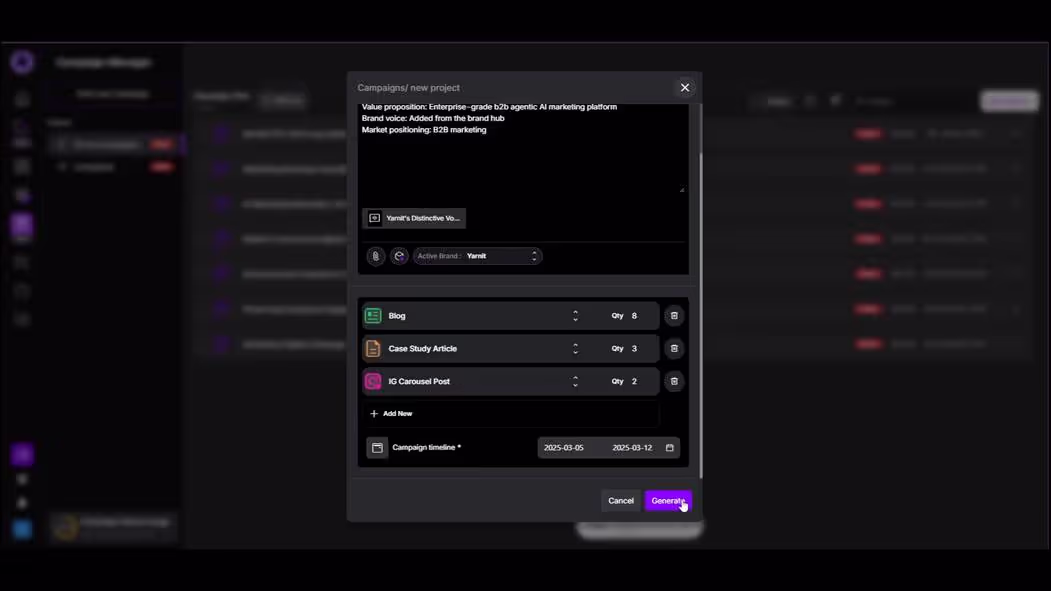
Choose the branding campaign and specify that the brand personality should reflect Yarnit. Add Yarnit's brand voice accordingly. You can also attach any related documents using the attach feature.
Step 4
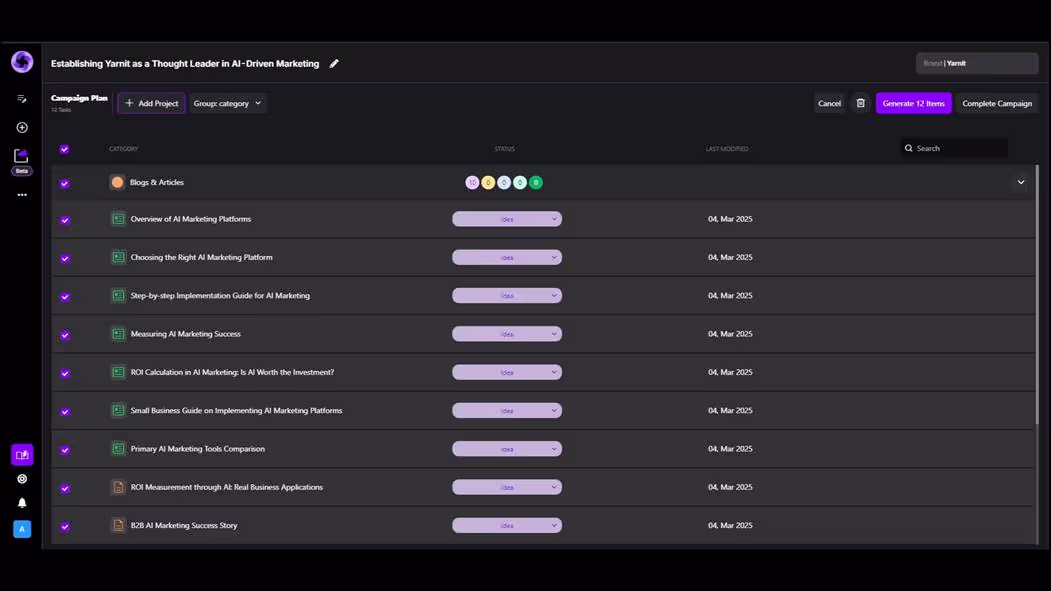
Next, define the content mix. For instance, you might opt for 6-8 blogs and 2 case study articles. You can add more by selecting the "Add New" button. You may also wish to include a carousel. Specify the campaign timeline to assist our agents in determining the optimal times for content posting.
Step 5
Observe the included blogs, case study articles, and social posts. You have the option to select all items and generate them simultaneously.
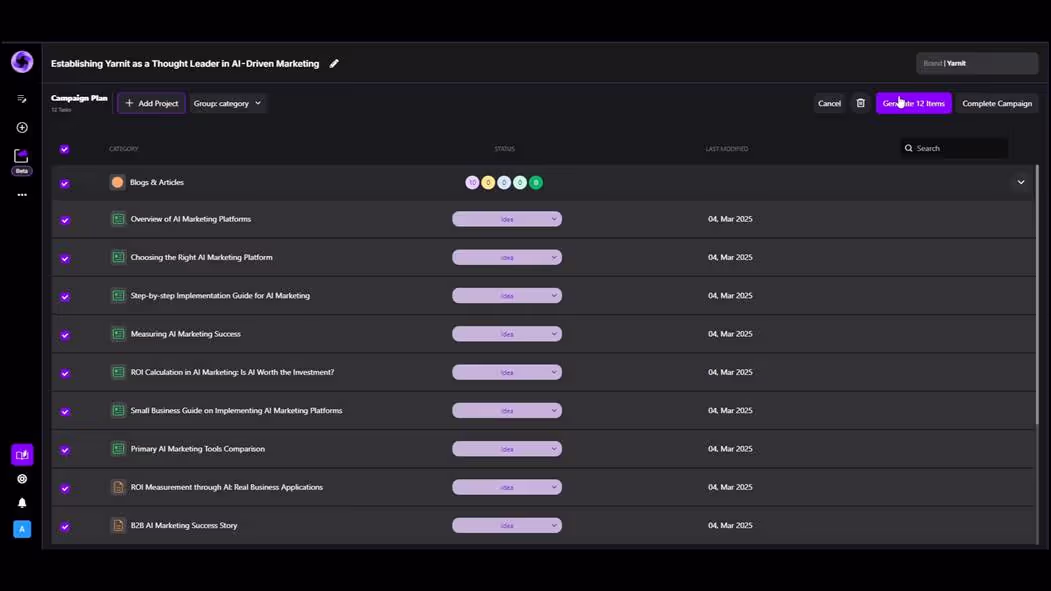
Step 6
By clicking "Generate 12 Items," all selected content will be generated. Alternatively, you can explore a detailed view for each item, which provides outlines and any attached documents along with relevant keywords.
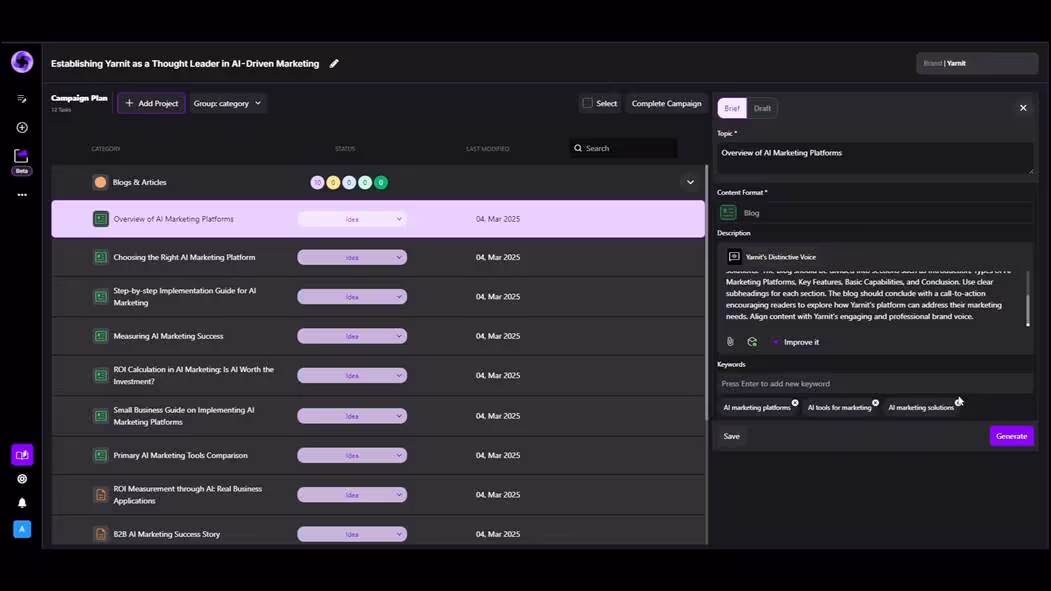
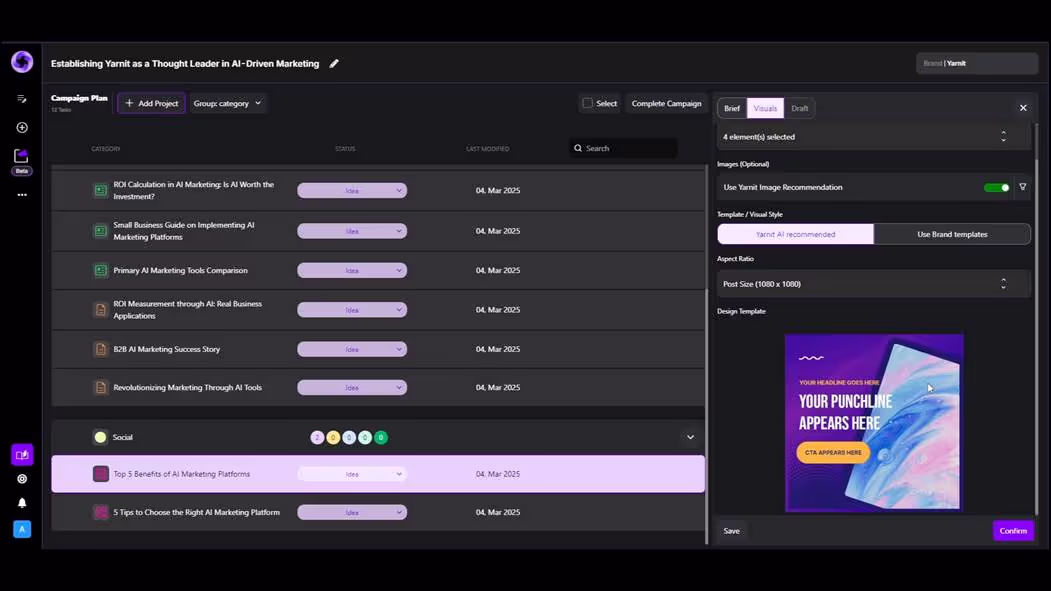
Step 7
You can modify the content prompt as needed, or enhance it using the "Improve It" button. For social posts, you'll see the visuals that will be used, whether they are your brand templates or Yarnit's templates.
Step 8
The brief can be completely customized according to your requirements. Once all details are finalized, generate the content to receive a month's worth of material with an organized campaign plan at your fingertips.
Step 9
This concludes the overview of Yarnit's campaign builder.